Full bleed printing
Our products have different bleed requirements, but for most print items, you must include a 3mm bleed area outside the trim line and a 5mm quiet area inside the trim line.
Visible bleed lines in your final designs are unnecessary, but you must add them during your design process. A bleed will prevent unprinted white edges from appearing around the edge of your print work and keeps your main design elements away from the trim line, fold or spine margins. And adding a quiet area inside the trim line will prevent other vital design elements from being placed too close to the edge of the paper.

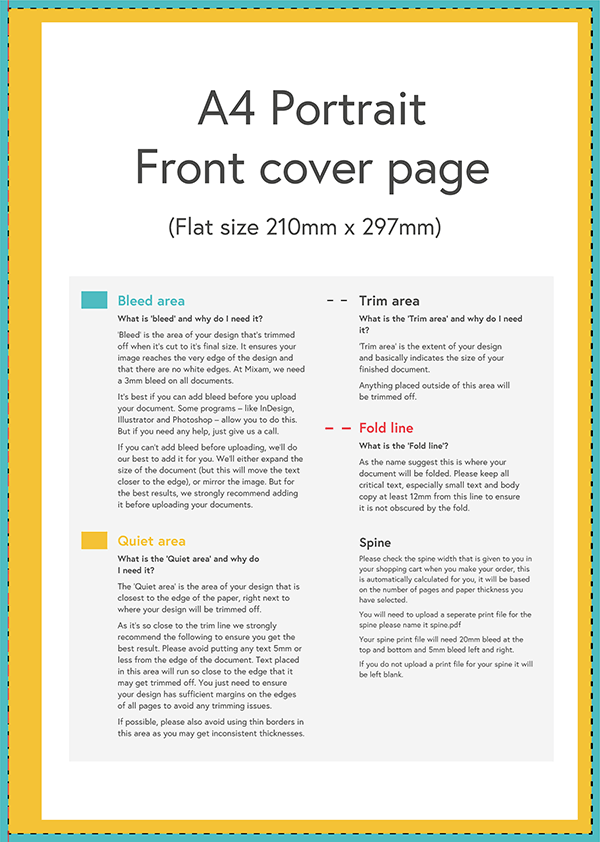
Bleed area
We will trim off the 3mm bleed area that extends away from the trim line, but you should ensure your design fills the bleed area to prevent white borders.
When you create a bleed area in your chosen design application, you must extend the page content that touches the trim edge into the bleed area. You can read more about bleed on our Blog here.

Trim line
Inside a page edge, a dotted line indicates where our print experts will trim your prints to size. During the printing process, manufacturing variance can occur, meaning a cutting blade can sometimes cut the paper on either side of the trim line. Reasons for manufacturing variance include slight blade misalignment or paper moving due to pressure from the cutting blade. While these are acceptable within industry standards, it demonstrates just how important bleed and quiet areas are as design features.

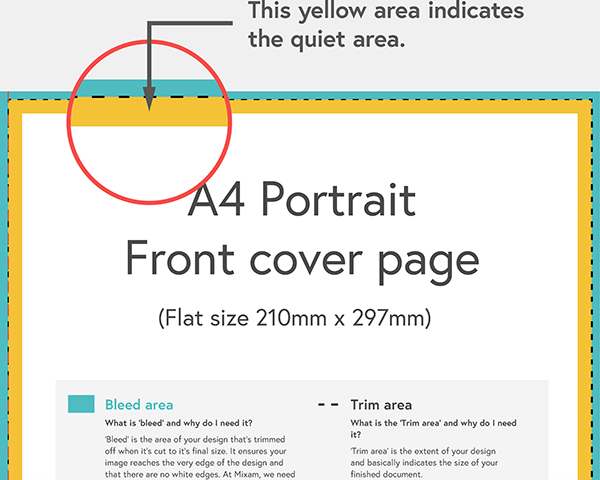
Quiet area
The 5mm quiet area extends inwards from the trim line. Like the bleed area, it safeguards your content from being trimmed away should the cutting blade not cut precisely on the trim line. But it also keeps text and graphics away from the edge of the paper. So when we print your project, the quiet area is another precaution to ensure your final prints are pleasing to the eye.
Bindings
The template above is perfect for straightforward printing jobs, like staple-bound Booklets and single sheet Leaflets or Posters. We recommend a 5mm quiet area on all print work, but it can increase for binding options like perfect-bound, wiro-bound, and Hardcover (Casebound) items.
Example of a Perfect-bound template
Example of a Wiro-bound template
Example of a Hardcover template
Extending your design
Bleed is essential to ensure your final product looks polished and professional. When you add an extra 3mm area outside the edge of your design, you only need to extend your artwork past the trim line to cover the bleed area completely.
TIP: When working in a program like InDesign, select Use Document Bleeds in the Export PDF dialogue box to ensure your files include the bleed.
Mixam has an extensive selection of templates for many sizes and binding types. The templates are free to download and have detailed explanations to help you create print-ready files.

